
From the 1950s to the 1980s, many homes featured popcorn ceilings, also known as acoustic or cottage cheese ceilings. Builders liked them because they could conceal flaws and reduce noise. Today, many people consider them ugly, outdated, and sometimes even hazardous. Removing or redoing a popcorn ceiling can make a home look more modern, improve the air quality inside, and increase the property’s value. But it’s not as easy as just scraping and painting over it. To achieve safe, polished, and long-lasting results, you need to plan, use the right tools, and have professional knowledge.
Why Professional Popcorn Ceiling Removal Matters
Many homeowners initially consider removing a popcorn ceiling a do-it-yourself project. However, this approach often leads to unnecessary risks and costly mistakes.
Concerns about asbestos: Popcorn ceilings installed before the mid-1980s may contain asbestos. If you’re not familiar with the process, disturbing asbestos fibres can release hazardous particles into the air, potentially causing severe health issues.
Damage that isn’t visible: There may be cracks, water leaks, and old repairs hidden under the texture. Removing material incorrectly can worsen structural problems.
Dust and debris: When you scrape by hand, you make a lot of dust that can quickly spread throughout the house if you don’t keep it contained.
Compliance requirements: In many places, local building codes specify how to dispose of hazardous materials like asbestos.
Professionals bring the experience, safety equipment, and dust-extraction systems needed to complete the project efficiently. Their expertise ensures ceilings are finished smoothly, without damaging drywall or creating a lasting mess.
Step 1: Initial Assessment and Testing
Every successful popcorn ceiling project begins with a thorough assessment.
Visual inspection: The team checks for stains, cracks, sagging areas, and water damage. These signs determine whether the ceiling can be refinished directly or if repair is required.
Asbestos testing: If asbestos is present, professional abatement procedures are necessary. This step is critical, as improper handling of asbestos can cause severe health risks.
Planning the approach: Once testing is complete, the removal method is tailored to the ceiling’s condition, the homeowner’s design goals, and safety requirements.
This phase prevents surprises later and ensures the project complies with health and safety regulations.
Step 2: Preparing the Work Area
Proper preparation is essential for a clean, efficient job. Before starting the removal, professionals make sure the work site is safe:
Covers for protection: Heavy-duty plastic sheeting and drop cloths are put on floors, walls, and fixtures. The furniture is either moved out of the room or completely wrapped in plastic.
Sealing off areas: Painter’s tape and plastic are used to seal off vents, windows, and doorways, preventing dust from escaping.
Protecting workers: Teams wear gloves, respirators, and protective clothing to prevent dust and particles from coming into contact with their skin.
Managing ventilation: It’s crucial to have good airflow, but it must be carefully controlled to prevent dust from spreading to other parts of the house.
These steps reduce the time required to clean up and ensure both the workers and the home are safe.
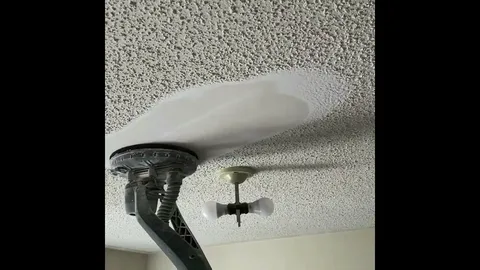
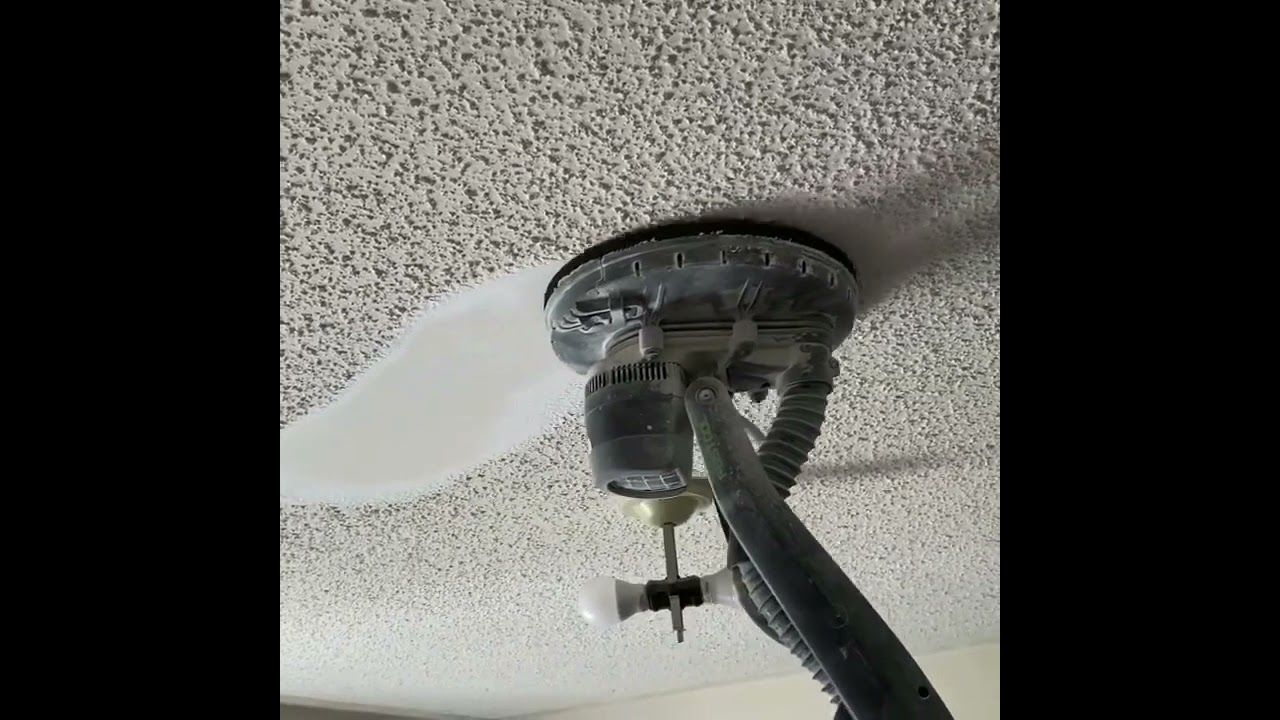
Step 3: Festool Popcorn Texture Removal
To remove a traditional popcorn ceiling, you typically need to spray water on it and scrape it by hand. This method is slow, messy, and can damage drywall.
Professionals use Festool dust-extraction systems for a better, cleaner solution:
Dry removal: Festool machines remove texture without weakening the drywall, so you don’t have to soak the ceiling with water.
Dust control: Built-in vacuum systems catch particles at the source, stopping dust from spreading through the air.
Efficiency: The tools work faster than scraping by hand, which reduces the time required to complete a project.
Preventing damage: The ceiling’s structural integrity is maintained because there is no aggressive scraping or too much water.
This method is cleaner and much more accurate, leaving a stable surface ready for refinishing.
Step 4: First Skim Coat Application
After the popcorn texture is removed, the ceiling surface requires refinement. Professionals apply a thin skim coat of joint compound across the entire area.
This layer:
- Corrects minor dents, seams, or imperfections exposed during removal.
- Establishes a uniform base for further finishing.
- Ensures long-term durability by sealing and strengthening the ceiling surface.
The skim coat is applied evenly with trowels and smoothed carefully to maintain consistency.
Step 5: Priming to Identify Imperfections
Once the skim coat has dried, a high-quality primer is applied. This step serves two critical purposes:
Sealing the ceiling: Primer creates a protective layer that prepares the surface for paint.
Revealing flaws: Under bright lighting, primer highlights dents, seams, and uneven areas that were not visible in the unpainted compound.
This stage is a quality check. It allows professionals to spot imperfections early and refine them before painting.
Step 6: Repairing and Smoothing the Ceiling
Ceilings must be perfectly level before the final paint is applied. Professionals revisit every highlighted flaw:
- Additional layers of joint compound are applied to correct dents or ridges.
- Each layer is sanded smooth with dust-controlled sanding tools.
- Inspections are repeated under bright, angled lighting to ensure no uneven patches remain.
The process may require several passes, but the result is a seamless, polished surface.
Step 7: Cleaning and Painting
With the ceiling smoothed, the project enters its final stage:
Full cleanup: Heavy-duty vacuums effectively remove dust and debris. Wiping down surfaces with wet cloths removes any remaining dirt.
Professional painting: The homeowner chooses the finish for the ceiling, which can be flat for a soft look, eggshell for a subtle sheen, or semi-gloss for extra durability. Rollers provide an even coat, while angled brushes are used for edges and corners. The completed ceiling is bright, clean, and modern, significantly enhancing the room’s overall appearance.
Cost and Time Considerations in Popcorn Ceiling Projects
Factors Influencing Cost
Ceiling Size and Height: Larger rooms or those with vaulted ceilings require more labour and materials, increasing the overall cost.
Condition of the Ceiling: Ceilings with cracks, water damage, or sagging require additional repair, increasing the overall expense.
Presence of Asbestos: If asbestos is detected, professional abatement is required, which can significantly increase the cost of the project.
Chosen Finish: The final ceiling finish also influences price. A basic flat coat of paint is less costly than premium eggshell or decorative finishes.
Timeframe for Completion
Most standard-sized rooms can be completed in one to two days, including preparation, removal, skim coating, priming, and painting. Larger spaces or ceilings requiring asbestos remediation may extend the timeline to several days. The complexity of the chosen finish also plays a role — decorative coatings or multiple skim coats add more time for drying and finishing.
Long-Term Value
While upfront costs may seem significant, professional removal or redoing adds long-term value to the home. Smooth ceilings enhance resale potential, improve indoor air quality, and reduce maintenance compared to textured finishes.
Safety and Compliance in Popcorn Ceiling Removal
Handling Asbestos Safely
Popcorn ceilings installed before the 1980s often contain asbestos. If testing confirms its presence, certified abatement specialists are required to remove or encapsulate the material. They follow government-mandated procedures for containment, removal, and disposal, ensuring no fibers are released into the home. Attempting to handle asbestos without proper training is dangerous and can result in legal liability.
Protecting Air Quality and Health
Dust generated during removal can affect indoor air quality if not properly managed. Professional teams use dust-extraction systems like Festool machines that capture particles directly at the source. Workers wear respirators, gloves, and protective clothing, while the work area is sealed to contain dust. These measures reduce exposure risks and maintain a safe home environment.
Compliance with Local Regulations
The disposal of asbestos or construction waste must comply with local building codes and environmental laws. Professionals ensure waste is bagged, sealed, and transported to approved facilities. Homeowners benefit from the peace of mind that comes with knowing their project is both legally compliant and environmentally responsible.
Accident Prevention During Work
Popcorn ceiling removal requires working overhead, often on ladders or scaffolding. Professionals are trained to use proper equipment, maintain stable footing, and prevent falls to ensure their safety and the safety of others. Safety protocols protect both workers and property, reducing the risk of accidents.
Conclusion
Redoing or removing a popcorn ceiling is a complex task that requires precision, advanced equipment, and strict safety practices. Professionals employ step-by-step methods to deliver flawless ceilings that enhance the home’s appearance. By investing in expert services, homeowners avoid risks, comply with regulations, and enjoy ceilings that are smooth, bright, and timeless.
FAQs
- Why should popcorn ceiling removal not be a DIY project?
Due to the risks of asbestos exposure, dust inhalation, and the potential for drywall damage, professionals have the necessary training and tools to handle removal safely and effectively. - What makes the Festool system better than traditional scraping?
It removes texture without wetting or scraping, captures dust at the source, and leaves drywall intact, making the process faster and cleaner. - How can I tell if my popcorn ceiling contains asbestos?
Only lab testing can confirm asbestos. A professional takes a small sample and sends it to a certified lab for analysis. - Can redoing popcorn ceilings be more cost-effective than removing them?
Options like drywall overlays or retexturing can refresh the ceiling at a lower cost, especially when asbestos is present. - What finish is best after popcorn ceiling removal?
Flat finishes hide imperfections, while eggshell or semi-gloss finishes add durability and reflect more light. The choice depends on design preference.